DIY Home Projects You Can Actually Finish This Weekend
Camille Cooper • 01 Jan 2026 • 120 views • 3 min read.You've pinned hundreds of DIY projects on Pinterest—painted accent walls, custom shelving, refinished furniture, backyard renovations. You bought supplies enthusiastically, started projects confidently, then abandoned them half-finished when they proved harder, more time-consuming, or more expensive than expected. Your garage holds unfinished projects from three years ago, your half-painted room mocks you daily, and you've accepted you're "not a DIY person." The truth: You're not failing at DIY—you're choosing wrong projects. Most popular DIY tutorials showcase either unrealistic timelines (that "weekend project" took a professional 40 hours) or require advanced skills/tools beginners don't have. Meanwhile, genuinely achievable weekend projects that dramatically improve your space get overlooked because they're "too simple" or "not Instagram-worthy." This guide features realistic DIY projects completable in one weekend (or less) by beginners, requiring minimal tools, modest budgets, and delivering maximum impact. These you'll actually finish.
What Makes a Weekend Project Actually Doable?
Realistic criteria:
Time: 2-8 hours total work time
Not: 2-8 hours/day for entire weekend But: Total active work time across both days
Allows for:
- Breaks
- Drying time
- Mistakes/redos
- Real life interruptions
Skill level: True beginner
Can you:
- Use a screwdriver?
- Paint in straight-ish lines?
- Measure with tape measure?
- Watch a YouTube tutorial?
Then you can do these projects
Tools: Basic or easily borrowed
Required tools should be:
- Owned by most people (hammer, screwdriver)
- Borrowable from friends/neighbors
- Rentable from hardware store ($10-30/day)
- Under $50 to purchase if needed
No specialized equipment costing hundreds
Budget: Under $100 per project
Materials should be:
- Affordable
- Available at Home Depot/Lowe's
- Not requiring bulk purchases
Impact: Visible, meaningful improvement
You should:
- Notice difference immediately
- Feel proud showing others
- Get measurable value for effort
Not subtle changes only you notice
The Weekend DIY Toolkit (One-Time Investment)
Basic tools for most projects ($50-100 total):
✅ Cordless drill/driver ($40-60)—most important tool ✅ Tape measure (25 ft, $5-10) ✅ Level (2 ft, $8-15) ✅ Hammer ($10-15) ✅ Screwdriver set ($10-20) ✅ Paintbrushes/roller ($15-25) ✅ Utility knife ($5-10) ✅ Stud finder ($10-20)
You likely own some already
Borrow/rent for specific projects:
- Miter saw
- Sander
- Paint sprayer
Project 1: Accent Wall (3-4 hours, $40-80)
Biggest impact, easiest execution:
What you need:
- Paint (1 gallon, $30-50)
- Painter's tape ($5-10)
- Roller and tray ($10-15)
- Drop cloth ($5)
Steps:
- Choose wall (focal wall—behind bed, sofa, or interesting architectural feature)
- Prep: Move furniture, tape edges (baseboards, adjacent walls, ceiling)
- Paint: Two coats (2 hours total work, 2-3 hours drying between)
- Remove tape while paint slightly wet (clean lines)
Tips:
- Bold colors have biggest impact (navy, emerald, terracotta)
- Paint ceiling line first, then fill in (easier than you think)
- Quality paint = fewer coats needed
Common mistakes to avoid:
- Skipping painter's tape (messy edges)
- Removing tape after paint fully dry (pulls paint off)
- One coat only (shows streaks)
Time breakdown:
- Prep: 30 min
- Paint coat 1: 45 min
- Dry: 2-3 hours
- Paint coat 2: 45 min
- Cleanup: 30 min
Total active work: 3 hours
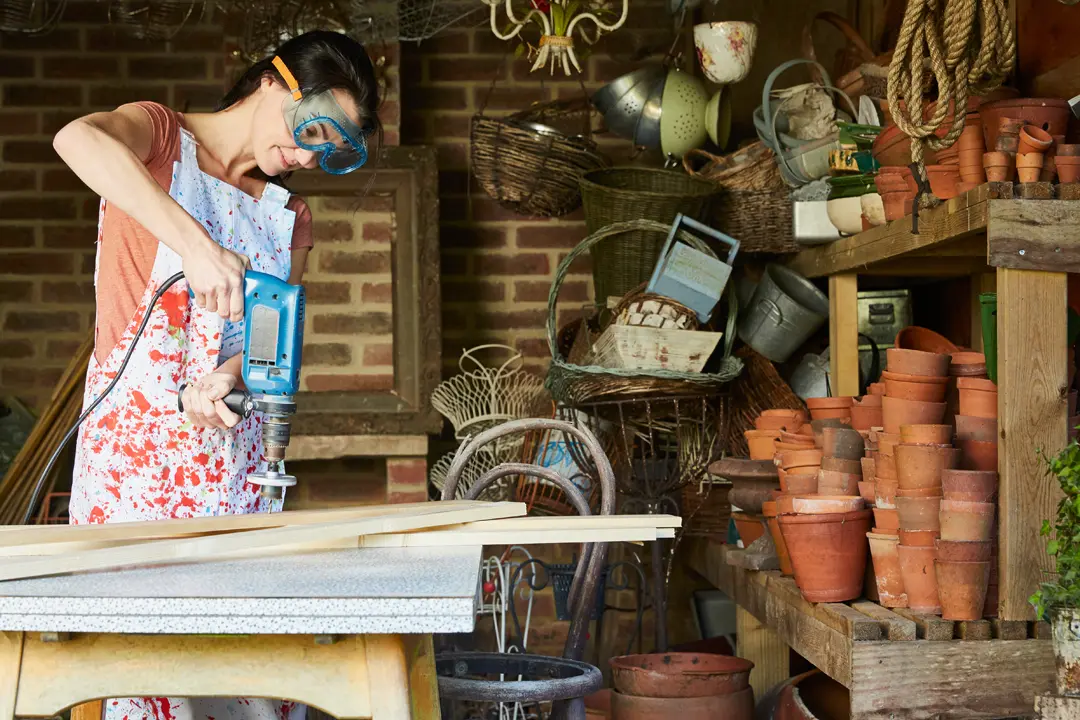
Project 2: Floating Shelves (2-3 hours, $30-60)
Instant storage and style:
What you need:
- Floating shelf brackets ($15-30 for pair)
- Wood board ($15-30, cut to size at store)
- Drill
- Level
- Stud finder
- Screws (included with brackets)
Steps:
- Find studs (use stud finder—essential for weight-bearing)
- Mark placement (use level—crooked shelves obvious)
- Install brackets (drill into studs)
- Slide shelf onto brackets
- Style shelf (books, plants, décor)
Where to install:
- Above desk (storage + display)
- Kitchen (spices, dishes)
- Bathroom (towels, toiletries)
- Living room (books, photos)
Tips:
- Install into studs (drywall anchors insufficient for weight)
- Measure twice, drill once
- Start with one shelf (perfect technique before installing multiple)
Time breakdown:
- Find studs, measure, mark: 30 min
- Install brackets: 30 min
- Mount shelf: 15 min
- Style: 45 min
Total: 2 hours
Project 3: Bathroom Hardware Update (1-2 hours, $40-80)
Instant modern upgrade:
What you need:
- New towel bars/rings ($30-60)
- New drawer/cabinet pulls ($10-20)
- Screwdriver
- Level
Steps:
Towel bars:
- Remove old hardware (unscrew)
- Fill old holes with spackle if needed (5 min to dry)
- Install new hardware (follow included instructions)
Cabinet pulls:
- Remove old pulls
- If new pulls don't align with old holes, fill and re-drill (or choose pulls that fit)
- Install new pulls
Why it works:
- Dated hardware ages entire bathroom
- Modern hardware = instant contemporary feel
- Easiest, cheapest bathroom update
Style tips:
- Matte black = modern, sophisticated
- Brushed nickel = classic, versatile
- Brass = warm, trendy
Match hardware across bathroom (faucet, towel bars, pulls)
Project 4: Closet Organization System (3-4 hours, $50-100)
Transform closet functionality:
What you need:
- Double hanging rod ($15-20)
- Shelf dividers ($10-15)
- Over-door shoe organizer ($10-15)
- Storage bins ($20-30)
- Slim hangers ($15-20)
Steps:
- Empty closet completely (assess space)
- Install double rod (short items like shirts—hang two rows)
- Add shelf dividers (prevent stacked sweaters from toppling)
- Hang over-door organizer (shoes, accessories)
- Place bins on high shelves (labeled for off-season items)
- Swap out hangers (slim hangers save 30% space)
Impact:
- Double hanging capacity
- Find items easily
- Maintain organization
No custom closet system needed—these additions transform standard closet
Project 5: Gallery Wall (2-3 hours, $50-100)
Personalized art display:
What you need:
- Frames (mix of sizes, 5-9 frames, $30-70)
- Photos/prints ($10-30 or free—personal photos)
- Hammer
- Nails/picture hanging strips
- Paper, tape, pencil (for planning)
Steps:
- Lay out on floor (arrange frames until you like composition)
- Trace frames on paper (create templates)
- Tape paper templates to wall (visualize before committing)
- Mark nail placements (through paper)
- Remove paper, hang frames
Layout tips:
- Grid pattern (uniform spacing—easier)
- Salon style (eclectic mix—more personality)
- Center large piece, build around it
Hanging tricks:
- Use Command strips for lightweight frames (renter-friendly, repositionable)
- Level each frame
- Measure between frames for consistency (2-3 inches spacing standard)
Project 6: Kitchen Backsplash (Peel-and-Stick) (3-5 hours, $60-120)
Major visual impact, no tile cutting:
What you need:
- Peel-and-stick tiles ($60-100 for typical backsplash)
- Utility knife
- Ruler/straightedge
- Level
Steps:
- Clean wall thoroughly (grease-free surface)
- Plan layout (start from center, work outward)
- Peel and stick tiles (align carefully)
- Trim edges with utility knife (along cabinets/counters)
- Press firmly (ensure adhesion)
Why peel-and-stick:
- No grout, no mess
- Removable (renter-friendly)
- Looks like real tile (good quality options available)
- Fraction of traditional tile cost
Pattern options:
- Subway tile (classic)
- Hexagon (modern)
- Moroccan (bold)
Project 7: Furniture Refresh with Paint (4-6 hours, $30-60)
Transform dated furniture:
What you need:
- Furniture paint ($25-40/quart)
- Sandpaper (120-grit, $5)
- Paintbrushes ($10-15)
- New hardware optional ($10-20)
Best candidates:
- Wood dressers, nightstands
- Laminate furniture (requires primer)
- Side tables, chairs
Steps:
- Remove hardware (knobs, pulls)
- Clean thoroughly (TSP cleaner or degreaser)
- Light sand (rough surface for adhesion)
- Paint 2-3 thin coats (better than one thick coat)
- Replace hardware (new pulls = extra upgrade)
Color ideas:
- Navy, forest green (sophisticated)
- White (Scandinavian, clean)
- Two-tone (drawers different from frame)
Drying time between coats: 2-4 hours
Project 8: Outdoor String Lights (2-3 hours, $40-80)
Instant ambiance:
What you need:
- String lights ($30-60)
- Hooks/mounting hardware ($10-20)
- Extension cord if needed ($10)
Installation:
- Plan route (patio, fence, trees, house)
- Install hooks (fence posts, house eaves, trees)
- Hang lights (slight sag is aesthetic)
- Plug in and enjoy
Patterns:
- Zigzag across patio
- Perimeter of deck
- Overhead canopy
Transforms outdoor space for evening use
Project 9: Mirror Installation (1 hour, $30-80)
Makes space feel larger and brighter:
What you need:
- Large mirror ($30-80)
- Mounting hardware (depends on weight)
- Stud finder
- Level
- Drill
Where to hang:
- Opposite window (reflects light)
- Narrow hallway (makes wider)
- Above dresser/console
- Entryway (functional + decorative)
Hanging tips:
- Heavy mirrors require studs or drywall anchors rated for weight
- Level is crucial (tilted mirror very obvious)
- Measure twice, drill once
Project 10: Drawer/Cabinet Organization (2-3 hours, $25-50)
Functional upgrade:
What you need:
- Drawer dividers ($15-30)
- Cabinet organizers (pull-out racks, lazy Susans, $10-20)
- Labels ($5)
High-impact areas:
Kitchen:
- Utensil drawer dividers
- Spice drawer inserts
- Pull-out trash can
Bathroom:
- Vanity drawer dividers
- Under-sink organizers
Bedroom:
- Sock/underwear dividers
- Jewelry organizers
Office:
- Desk drawer trays
- Cable management
Instant functionality improvement
Common DIY Mistakes to Avoid
Mistake 1: Not reading instructions
Result: Wrong installation, wasted materials
Fix: Read fully before starting
Mistake 2: Skipping prep work
Result: Poor adhesion, messy results
Fix: Prep = 50% of success (clean, sand, tape properly)
Mistake 3: Rushing
Result: Crooked, sloppy, redos required
Fix: Take your time, especially measuring
Mistake 4: Wrong tools
Result: Frustration, poor results
Fix: Use right tool for job (don't hammer screws)
Mistake 5: Unrealistic timeline
Result: Unfinished projects
Fix: Add 50% buffer to estimated time
When to DIY vs. Hire Professional
DIY when: ✅ Cosmetic (paint, décor, organization) ✅ Reversible (peel-and-stick, removable) ✅ Low-risk (worst case = redo, not disaster) ✅ You have time and interest
Hire professional when: ❌ Electrical work (safety hazard) ❌ Plumbing (water damage risk) ❌ Structural changes (walls, foundations) ❌ Requires permits ❌ You'll hate doing it (not worth stress)
Know your limits—some things aren't worth DIY savings
Achievable weekend DIY projects include accent walls (3-4 hours, $40-80, dramatic color impact), floating shelves (2-3 hours, $30-60, instant storage), bathroom hardware updates (1-2 hours, $40-80, modern upgrade), closet organization systems (3-4 hours, $50-100, double capacity), gallery walls (2-3 hours, $50-100, personalized display), peel-and-stick backsplash (3-5 hours, $60-120, no tile cutting), furniture painting (4-6 hours, $30-60, transformation), outdoor string lights (2-3 hours, $40-80, ambiance), mirror installations (1 hour, $30-80, space-enhancing), and drawer organization (2-3 hours, $25-50, functionality). Basic toolkit costs $50-100. Prep work equals 50% of success. Know limits—hire professionals for electrical, plumbing, and structural work.