Building Your First PC vs Buying Pre-Built: Cost, Performance, and Difficulty
Emily Carter • 05 Jan 2026 • 240 views • 3 min read.You need a new computer. You browse Best Buy—decent pre-built gaming PC costs $1,500. Your tech friend says "Build it yourself, save $500!" You panic: "I'll break something expensive!" "What if it doesn't turn on?" "I don't know what parts to buy!" So you buy the pre-built, overpaying for mediocre components and proprietary parts you can't upgrade. Meanwhile, your friend built identical specs for $1,000, knows exactly what's inside, and upgrades individual parts whenever needed. The truth: building a PC isn't as hard as you think—it's adult Lego with expensive pieces. Understanding that building saves 20-40% (pre-builts markup heavily), component selection matters (bottlenecks waste money), compatibility is solved by PCPartPicker (automatic checks), assembly takes 2-4 hours watching YouTube, and upgradability means your build lasts 6+ years transforms PC buying from mysterious black box to empowering, cost-effective choice. This guide compares building vs buying—helping you decide which is right for YOU.
The Cost Breakdown (Where Your Money Goes)
Understanding the numbers:
Example build: $1,000 gaming PC
If you build it yourself ($1,000 total):
| Component | Part | Price |
|---|---|---|
| CPU | AMD Ryzen 5 7600 | $220 |
| GPU | NVIDIA RTX 4060 | $300 |
| Motherboard | B650 chipset | $130 |
| RAM | 16GB DDR5 3200MHz | $60 |
| Storage | 1TB NVMe SSD | $60 |
| Power Supply | 650W 80+ Bronze | $70 |
| Case | Mid-tower ATX | $70 |
| CPU Cooler | Basic tower cooler | $30 |
| Windows 11 | License (or free) | $0-140 |
| Total | $940-$1,080 |
Performance: Plays modern games 1080p high settings 60+ FPS
Same specs pre-built ($1,400-1,600):
What you're paying for:
- Same components: $1,000
- Assembly labor: $150-200
- Pre-installed Windows: $140
- Warranty/support: $50
- Brand markup: $100-200
- Total: $1,440-$1,590
You're paying $400-600 extra (40-60% markup) for convenience
But sometimes pre-builts are better value:
During GPU shortages (2020-2022):
- RTX 3070 alone: $800 (scalper prices)
- Pre-built with RTX 3070: $1,200 total
- Building yourself was MORE expensive (weird economics)
Current market (2026): Building is cheaper again
Building Your PC: Pros and Cons
The DIY route:
Advantages (why build):
✅ Cheaper (20-40% savings)
- $1,000 build = $1,400-1,600 pre-built equivalent
- More money = better components OR same performance cheaper
✅ Exact components you want
- Choose brand preferences (ASUS, MSI, Corsair)
- No compromises (pre-builts cheap out on PSU, RAM)
- Aesthetics (RGB, color scheme, tempered glass)
✅ Upgradability
- Know exactly what's inside
- Upgrade GPU in 2 years (easy—one component)
- Standard parts (not proprietary like Dell)
✅ Learning experience
- Understand how computers work
- Fix issues yourself (don't pay $100 for tech support)
- Confidence troubleshooting
✅ Quality control
- Choose quality PSU (pre-builts use cheap PSUs that fail)
- Cable management (pre-builts often messy inside)
- You know it's done right
Disadvantages (why NOT build):
❌ Time investment (8-12 hours first build)
- Research parts (2-4 hours)
- Order and wait for shipping (3-7 days)
- Assembly (2-4 hours first time, 1 hour experienced)
- Installing OS/drivers (1-2 hours)
- Troubleshooting if issues (0-8 hours—hopefully zero)
❌ Risk of mistakes
- Breaking parts (bent CPU pins, cracked motherboard—rare but possible)
- Incompatible parts (if you don't research)
- DOA (dead on arrival) parts (1-5% failure rate, RMA process)
- Won't turn on (panic-inducing but usually simple fix)
❌ No single warranty
- Each part has separate warranty (CPU 3 years, GPU 2 years, etc.)
- If problem, YOU troubleshoot which part failed
- Pre-built: Call company, they fix everything
❌ No tech support
- Blue screen? You Google it
- Won't boot? You troubleshoot
- Pre-built: Call support line
❌ Need tools (minor)
- Screwdriver ($5-10)
- Thermal paste (often included with cooler)
Buying Pre-Built: Pros and Cons
The convenient route:
Advantages (why buy pre-built):
✅ Convenience (plug and play)
- Arrives assembled, tested, working
- Boot up and start using immediately
- No research needed (someone chose parts for you)
✅ Single warranty
- Entire PC covered (1-3 years)
- Something breaks? Company handles it
- They troubleshoot which part failed
✅ Tech support
- Call/chat/email for help
- Beginners benefit from this
✅ Pre-installed OS and software
- Windows activated
- Drivers installed
- Sometimes bloatware (negative)
✅ Tested before shipping
- Should work out of box
- No "will it turn on?" anxiety
✅ Good during component shortages
- When GPUs scarce, pre-builts sometimes only option
Disadvantages (why NOT pre-built):
❌ More expensive (20-60% markup)
- $1,000 DIY build = $1,400-1,600 pre-built
❌ Cheaper components where you can't see
- PSU: Often cheap no-name brand (fire hazard, fails early)
- Motherboard: Basic model (fewer upgrade options)
- RAM: Slow speeds, single-channel (bad performance)
- Cooling: Minimal (CPU runs hot, throttles)
- They advertise CPU/GPU, cheap out on everything else
❌ Proprietary parts (especially Dell, HP)
- Custom motherboards (can't upgrade easily)
- Weird PSU connectors (can't swap PSU)
- Small cases (limited GPU upgrade options)
- Locked BIOS (can't overclock)
❌ Bloatware
- Pre-installed trial software (McAfee, Norton)
- Slows down PC
- Need to uninstall everything
❌ Poor cable management
- Messy inside (doesn't affect performance but ugly)
- Harder to work on later
❌ Limited customization
- Can't choose specific brands
- RGB may be locked to their ecosystem
- Aesthetics not your style
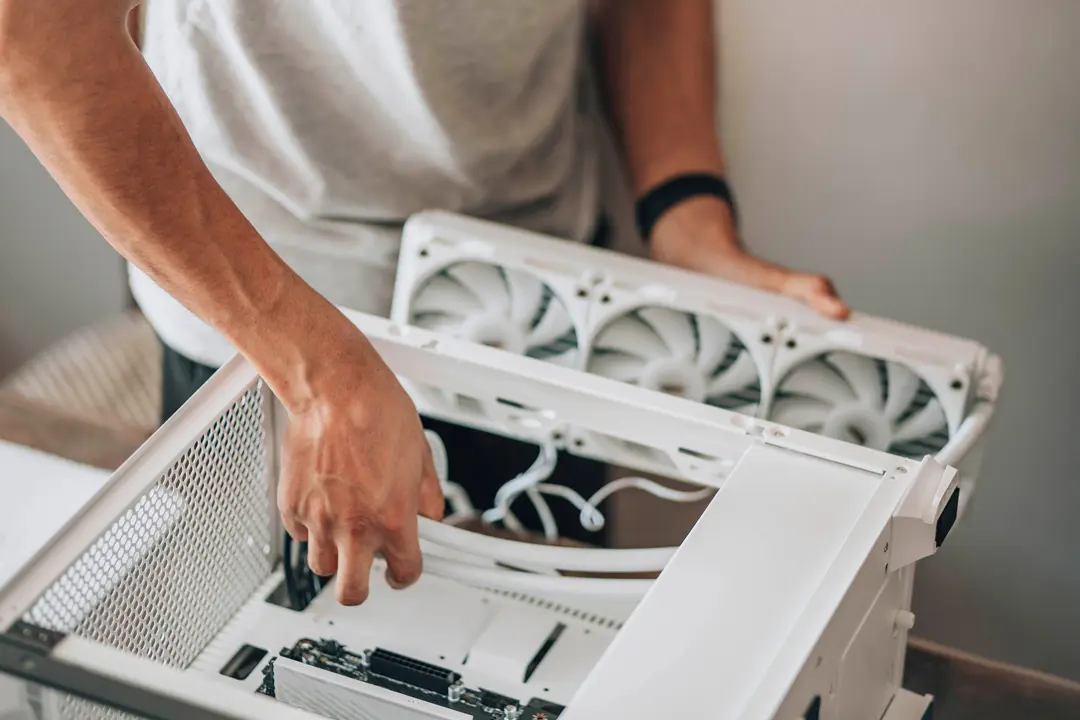
Difficulty: Is Building REALLY That Hard?
The truth about difficulty:
What building actually involves:
Step-by-step process:
-
Install CPU on motherboard (5 min)
- Lift lever, drop CPU in socket (align triangle), close lever
- Can you mess up? Yes—bend pins (Intel) or break pins (AMD)—but VERY hard if you're gentle
-
Install RAM (2 min)
- Line up notch, press down until clicks
- Can you mess up? No—either fits or doesn't
-
Install M.2 SSD (3 min)
- Slide into slot, screw down
- Can you mess up? Extremely hard—basically impossible
-
Install motherboard in case (10 min)
- Screw into standoffs
- Can you mess up? No—just tedious
-
Install PSU (5 min)
- Screw into case
- Can you mess up? No
-
Connect PSU cables (20 min)
- 24-pin motherboard, 8-pin CPU, GPU power, SATA
- Can you mess up? Hard—connectors shaped to fit only one way
-
Install GPU (5 min)
- Remove slot covers, insert GPU into PCIe slot, screw down
- Can you mess up? No—slots are keyed
-
Install CPU cooler (15 min)
- Apply thermal paste, mount cooler, plug in fan
- Can you mess up? Yes—forgot thermal paste = CPU overheats (but won't break, just thermal throttles)
-
Connect case fans/front panel (15 min)
- Tiny connectors for power button, USB, audio
- Can you mess up? Annoying but won't break anything
-
Cable management (30 min)
- Route cables behind motherboard tray, zip tie
- Optional (ugly but works without it)
Total time first build: 2-4 hours (plus YouTube breaks for tutorials)
Skills required: ZERO
Seriously:
- No soldering
- No programming
- No electronics knowledge
- Just follow instructions (like IKEA furniture)
Resources:
- YouTube: "How to build a PC 2026" (dozens of step-by-step videos)
- PCPartPicker guides (written tutorials with photos)
- Reddit r/buildapc (ask questions, instant answers)
Difficulty rating: 3/10 (easier than building IKEA desk)
Compatibility: How to Not Buy Wrong Parts
The scary part (solved easily):
PCPartPicker.com ⭐⭐⭐⭐⭐
What it does:
- Automatic compatibility checking
- Add CPU → only shows compatible motherboards
- Add GPU → warns if PSU too weak
- Add RAM → only shows compatible speeds
- Red warning if incompatible parts selected
Example:
- Select AMD CPU → Intel motherboards disappear (can't mix)
- Select Mini-ITX case → Full ATX motherboards disappear (won't fit)
Compatibility is basically solved by this website (it's free)
Common compatibility mistakes (PCPartPicker prevents):
❌ AMD CPU + Intel motherboard (different sockets) ❌ DDR4 RAM + DDR5 motherboard (different slots) ❌ Huge GPU + tiny case (won't fit physically) ❌ Power-hungry components + weak PSU (won't boot) ❌ CPU cooler too tall for case (hits side panel)
Use PCPartPicker = avoid all these
Step-by-Step: How to Build Your First PC
Complete beginner process:
Phase 1: Research and planning (2-4 hours)
Step 1: Determine budget and purpose
- Budget: $600 (basic), $1,000 (mid-range gaming), $1,500+ (high-end)
- Purpose: Office work? Gaming? Video editing? Streaming?
Step 2: Watch 2-3 build guides on YouTube
- Recommendations:
- Linus Tech Tips "POV PC Build Guide"
- JayzTwoCents "How to Build a PC"
- Bitwit "Step-by-step First PC Build"
- Just watch—don't build yet
Step 3: Choose parts on PCPartPicker
- Start with pre-made build guides (PCPartPicker has these)
- Adjust to your budget
- Post on r/buildapc for feedback ("Rate my build")
- Adjust based on feedback
Phase 2: Ordering parts (3-7 days shipping)
Where to buy:
- Amazon (easy returns)
- Newegg (specializes in PC parts)
- Best Buy (can price match, immediate pickup)
- B&H Photo (no tax many states)
Check for deals:
- r/buildapcsales (daily deals posted)
- Price track on PCPartPicker (shows historical prices)
Buy all at once (so return windows overlap—if DOA, can return)
Phase 3: Assembly day (2-4 hours)
Setup:
- Clear table
- Anti-static (touch metal case occasionally—discharge static)
- Have YouTube build guide open on phone/tablet
Build outside case first (test bench):
- Install CPU, RAM, cooler on motherboard
- Connect PSU
- Try booting (should see BIOS)
- If works → install in case
- If doesn't work → easier to troubleshoot outside case
Take your time:
- Not a race
- Read manuals (actually helpful)
- Double-check connections
Cable management:
- Do basic (stuff cables behind tray)
- Perfection optional (doesn't affect performance)
Phase 4: First boot and OS (1-2 hours)
BIOS boot:
- Press power button
- Should see motherboard logo (BIOS screen)
- If this happens: You succeeded! 🎉
Install Windows:
- USB stick with Windows installer (Microsoft website, free download)
- Boot from USB
- Follow installation prompts (15-30 min)
- Install drivers (GPU, chipset, etc.—Windows Update handles most)
Done! You have functioning PC
When to Buy Pre-Built Instead
Sometimes pre-built makes sense:
Buy pre-built if:
✅ You value time > money
- Busy professional, rather pay $400 than spend 12 hours
✅ Zero tech knowledge and don't want to learn
- Not interested in how computers work
- Want plug-and-play
✅ Need warranty/support badly
- Business use (can't afford downtime)
- Not confident troubleshooting
✅ Component shortages
- GPU prices insane (check current market)
- Pre-builts sometimes cheaper during shortages
✅ Financing needed
- Pre-builts offer payment plans
- Building = pay cash upfront for parts
✅ Laptop needed
- Can't build laptop (obviously)
- Gaming laptops are always pre-built
Build if:
✅ Want to save $300-600 ✅ Enjoy learning new skills ✅ Want exact parts you choose ✅ Plan to upgrade over time ✅ Have 12 hours total time
Build PC saving 20-40% ($1,000 DIY build equals $1,400-1,600 pre-built equivalent) using PCPartPicker.com automatic compatibility checking preventing AMD CPU plus Intel motherboard mistakes. Assembly difficulty 3/10 requiring zero prior electronics knowledge—install CPU pressing into socket, RAM clicking into slots, GPU inserting PCIe, connecting PSU cables shaped fitting one direction only. Total time 2-4 hours first build watching YouTube guides (Linus Tech Tips, JayzTwoCents step-by-step tutorials). Buy pre-built if valuing time over money, needing single warranty covering entire PC, requiring tech support troubleshooting, or during GPU shortages when pre-builts paradoxically cheaper. Building provides upgradability knowing exact components inside, quality control choosing reliable PSU (pre-builts cheap out invisible components), learning troubleshooting confidence fixing issues yourself saving $100 tech support calls.